List of Topics
January 31, 2024
System Status
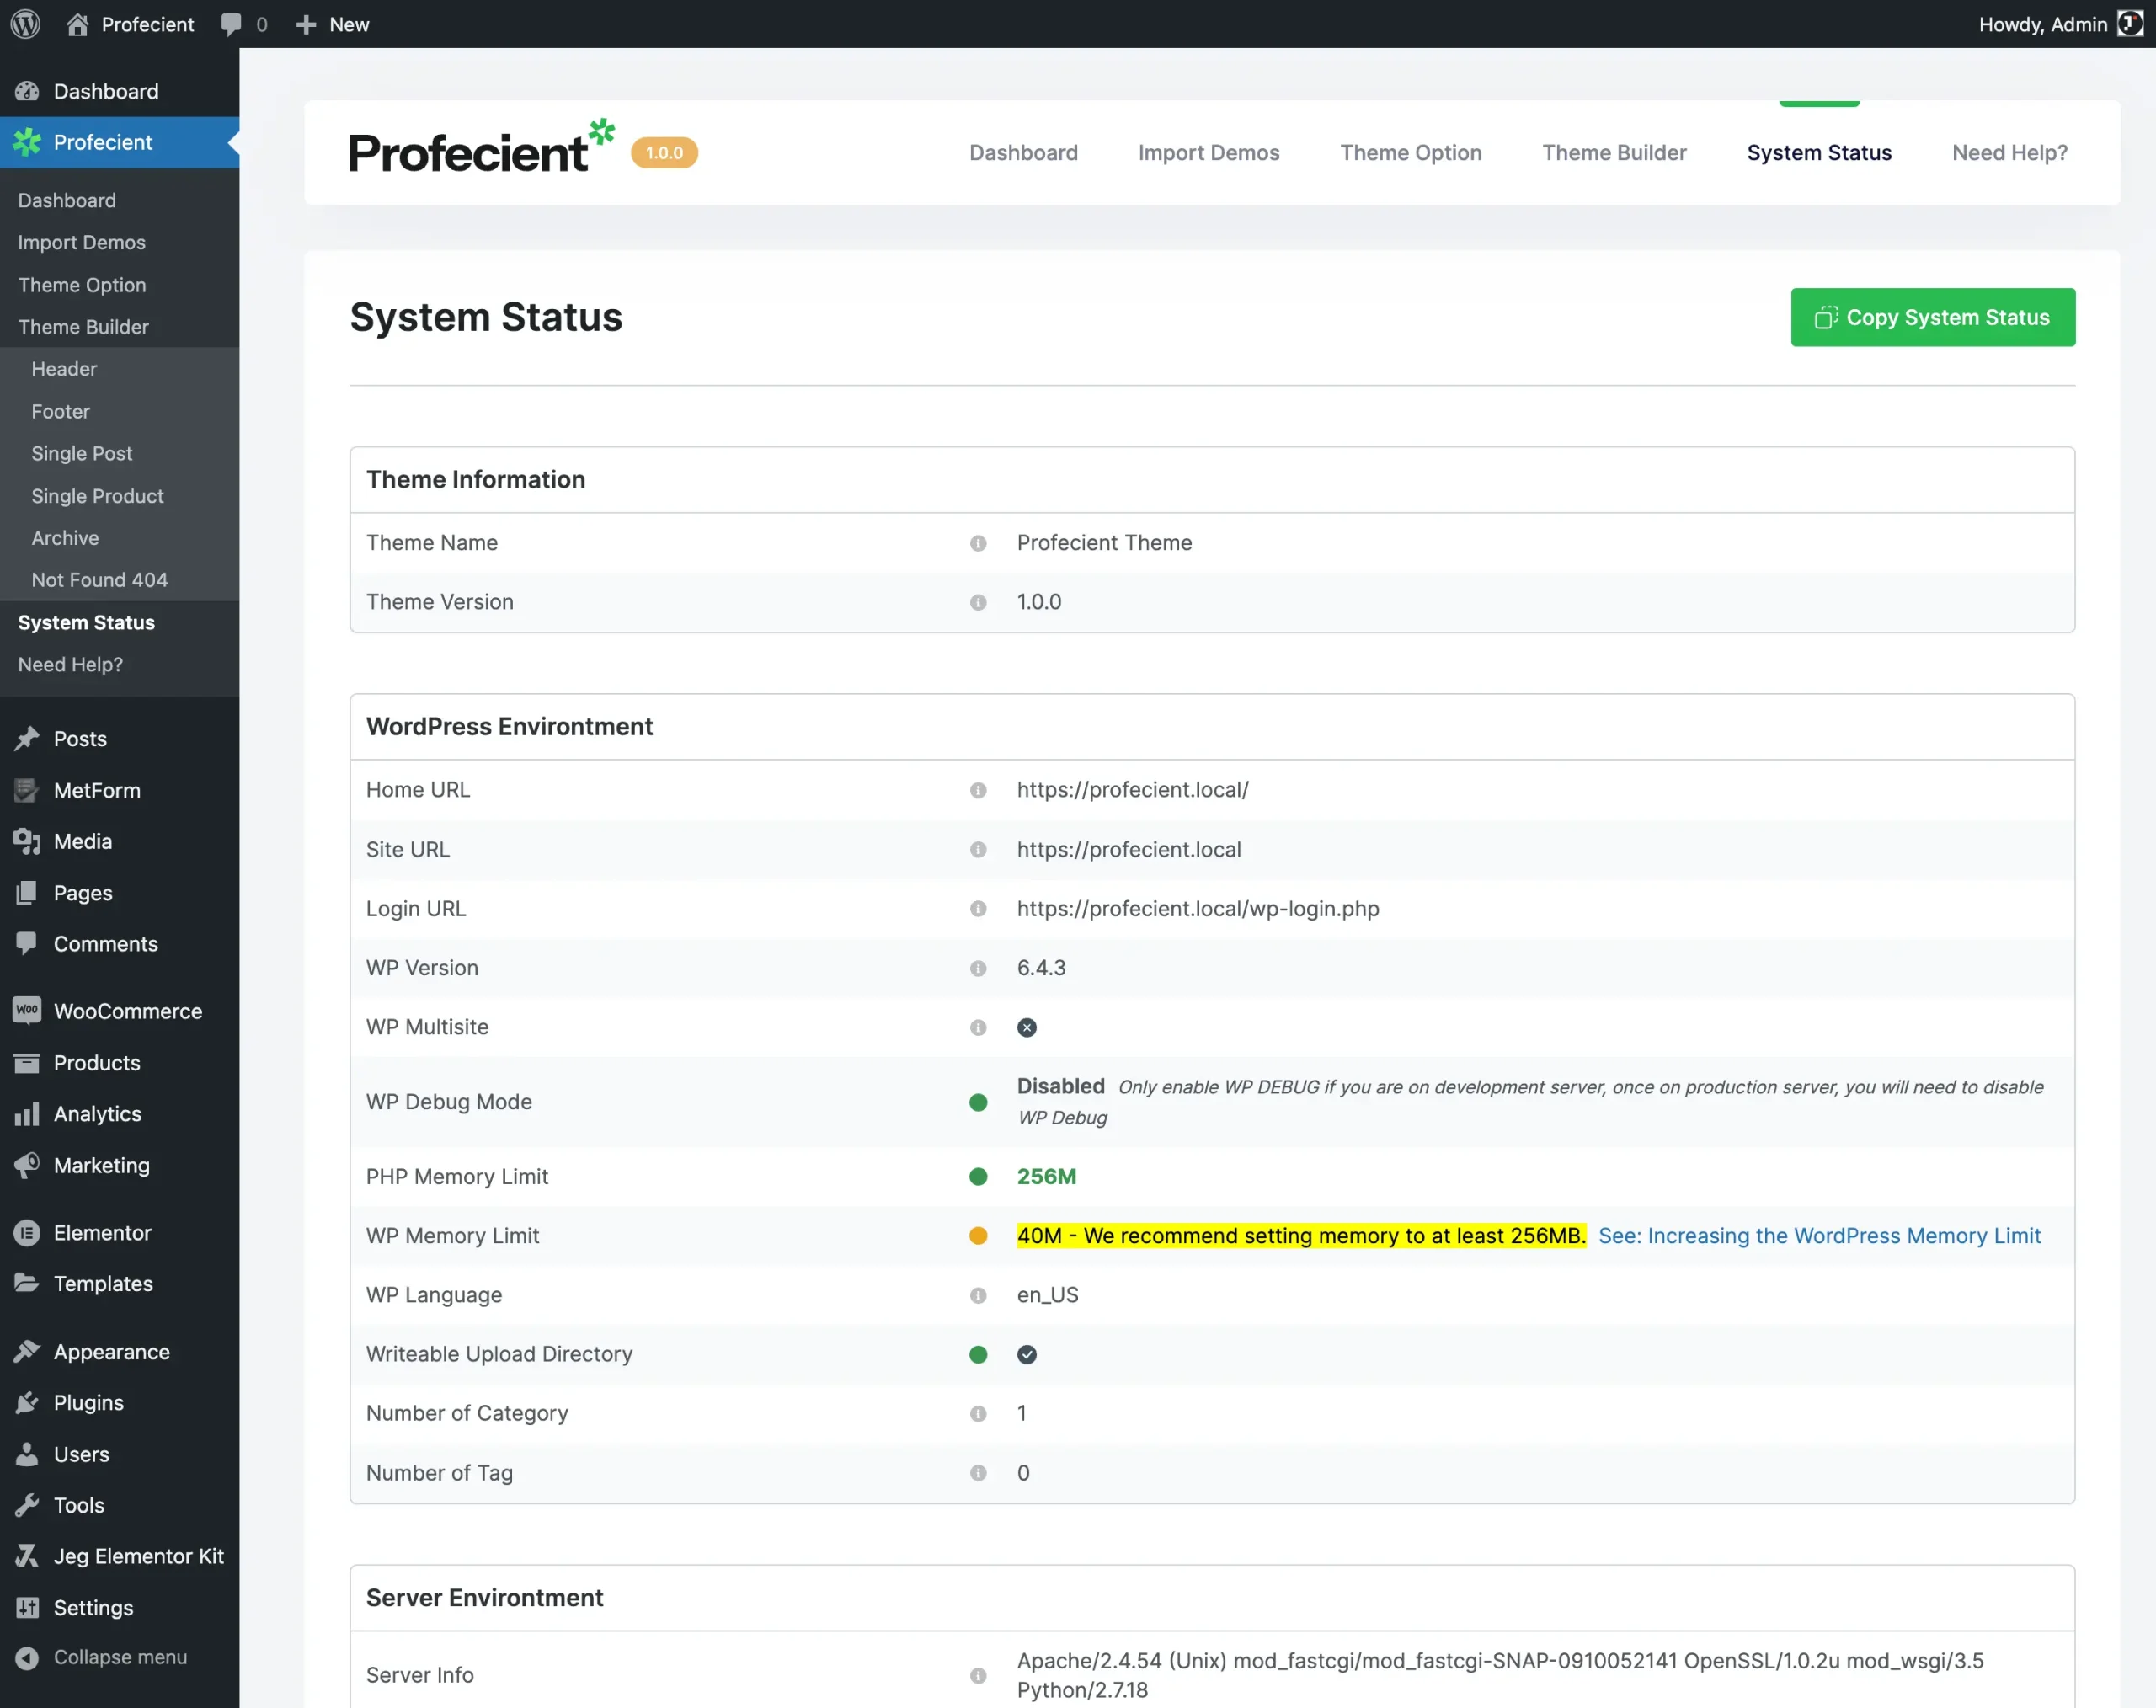
We provide you System Status report on Profecient Dashboard. In there you can check your theme information, WordPress environment, server environment, and currently activated plugins on your site.
You can navigate to System Status by going to the WordPress Admin → Profecient → System Status.

When you want to ask for support in our support forum, you can attach the information above by clicking the Copy System Report button.
Also please note that we highly recommend you follow Profecient system requirements to make all processes run as expected for better site performance.
There are a few things that we’ll explain to you in this part :
1. WP Debug
WP_DEBUG is a PHP constant that can be used to trigger the “debug” mode throughout WordPress. WP_DEBUG provides a handy way to troubleshoot problems when something goes wrong on your site.
Also, it’s important to know that WP_DEBUG should not be used on a live site.
You can find WP_DEBUG on wp-config.php file that located in the WordPress root directory. WP_DEBUG is set to false by default.
define( 'WP_DEBUG', false );
2. Memory Limit
In case to avoid exhausted memory size error in WordPress, you need to increase the memory limit value. This thing is also recommended from the WooCommerce plugin when you’re using them on your site. You can be setting the memory limit to at least 64MB (recommended: 128M).
To increase your memory limit please follow these 5 tips :
Tip 1: Increase the limit via PHP.ini file
You can directly increase the PHP Memory Limit if you’ve access to the PHP.ini file. Most small Shared hosting servers won’t give you access to the PHP.ini file. But some servers allow you to create a duplicate PHP.ini in your respective site Directories whose data/values will override the default PHP.ini values. To do that you just need to create a file with the name ‘php.ini’ in the directory where your WordPress site is installed. In that just add the command memory_limit = 128M in it to increase the Memory Limit to 128 MB.
Tip 2: Changing the Memory Limit via wp-config.php
If you don’t want to mess with the PHP.ini file, then you can go for this method. In this, you won’t be needing to create any extra files in your Directory. Just Adding
define('WP_MEMORY_LIMIT', '128M');in your wp-config.php would increase your PHP Memory Limit to 128 MB.
Tip 3: Modifying the .htaccess file to Increase Memory Limit
A Default WordPress Installation won’t have a .htaccess file. But in case you already have it for some purposes like ‘301 Redirection’, just add the command php_value memory_limit 128M in your .htaccess file and your memory limit will increase to 128 MB.
Tip 4: Changing the Memory Limit via wp-config.php
This method is just an Alternate to the php.ini method. Because the function of the code we use in this method is the same as what we put in the php.ini file. You just need to place the code
ini_set('memory_limit','128M');in wp-config.php file which is placed in the root folder of your WordPress installation.
Tip 5: Have a talk with your Host
If you are not a tech-savvy person things then it’s better to have a Live Chat / a Call with your Host right away. It’s your right to talk to them & get the necessary changes you need as you’ve paid for it.
3. Max File Upload
In this part, we will guide you on how to increase the max file upload size for your website. This is intermediate-level instruction. Please note, it may not work with some shared hosts, in this case, you would ask your host administrator regarding this thing.
- Edit php.ini File
post_max_size = 64M
upload_max_filesize = 640M
max_input_vars = 3000
max_execution_time = 300
- Edit .htaccess File
php_value post_max_size = 64M
php_value upload_max_filesize = 64M
php_value max_input_vars = 3000
php_value max_execution_time = 300

